

Owning the Night: A Guide to Flying Your Drone After Dark in Canada
- krdroneworks
- Dec 6, 2025
- 6 min read
There is a unique thrill to flying at night. The world looks different; cities become glowing grids, and landscapes take on a moody, cinematic quality. But for drone pilots in Canada, the question often arises: "Can I legally do this?"
The short answer is yes. Unlike the early days of drone regulation, night flying is permitted for both Basic and Advanced certificate holders, provided you follow specific rules.
However, "legal" doesn't always mean "easy." Night flying introduces risks that don't exist under the sun. This guide covers the regulations, equipment, and survival tips you need to operate safely when the lights go out.
1. Defining "Night": It’s Not Just When It Gets Dark
In casual conversation, night is when the sun goes down. In aviation, it is a precise legal definition found in the Canadian Aviation Regulations (CARs).
According to CAR 101.01, "Night" is the period of time between the end of evening civil twilight and the beginning of morning civil twilight.
What is "Civil Twilight"?
Civil twilight is that period after sunset (or before sunrise) where the sun is slightly below the horizon (6 degrees), but there is still enough ambient light to see clearly without artificial lighting.
Practical Rule: If you look at a weather app, it will often list "Sunset," "Civil Twilight End," and "Sunrise."
The Gap: The time between Sunset and the End of Civil Twilight is legally considered Day.
The Switch: Once civil twilight ends, Night rules (specifically regarding lighting) legally kick in.
Pro Tip: Don’t wait for the legal definition to turn on your lights. If visibility is dropping during twilight, turn them on. It's better to be seen early than late.
2. The Regulations: What is Required?
You do not need a special "Night Rating" on your drone certificate, nor do you need a Special Flight Operations Certificate (SFOC) for standard night operations. However, you must adhere to CAR Part IX.
The Golden Rule: CAR 901.39
This is the specific regulation governing night flight. It states:
No pilot shall operate a remotely piloted aircraft system at night unless the remotely piloted aircraft is equipped with lights that are sufficient to allow the aircraft to be visible to the pilot or a visual observer, whether with or without night-vision goggles, and those lights are turned on.
Visual Line of Sight (VLOS)
You must maintain Visual Line of Sight (VLOS) at all times (CAR 901.11). This is significantly harder at night.
You must be able to determine the drone's orientation (which way is it facing?) and position solely by looking at it.
If you can only see a dot of light but can't tell if it's flying toward you or away from you, you are skirting the edge of a violation.
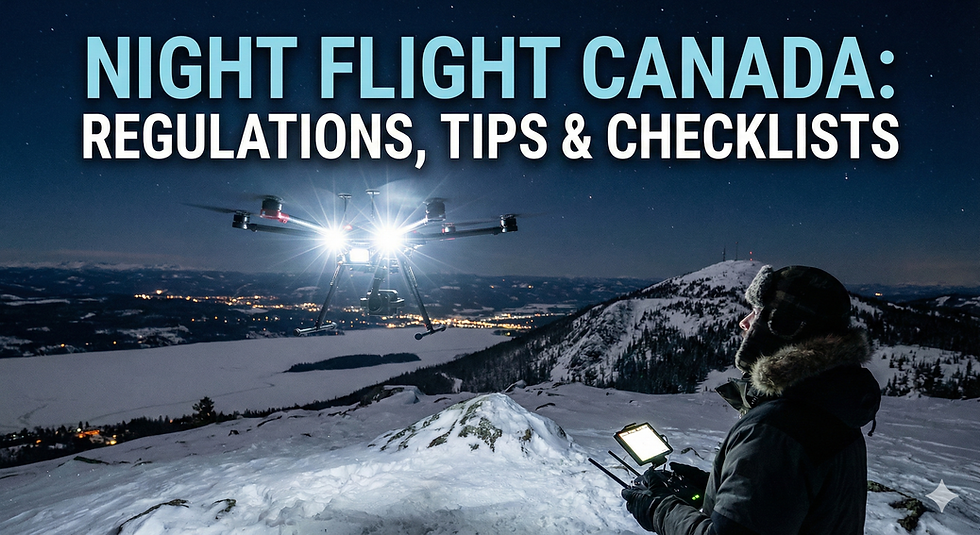
3. Equipment: Lighting the Way
Many pilots mistakenly believe the small LEDs on the arms of a DJI Mini or Air are sufficient. Often, they are not.
Required: Anti-Collision vs. Navigation Lights
While Transport Canada's wording is "sufficient to be visible," best practice dictates using two distinct types of lighting to maintain safety and orientation:
Navigation Lights (Position Lights): These are usually the Green/Red LEDs built into the drone. They help you determine orientation (Green = Right/Starboard, Red = Left/Port).
Anti-Collision Lights (Strobes): These are high-intensity flashing white lights. Their purpose is visibility—allowing other aircraft (manned or unmanned) to see you from a distance.
The "3-Statute Mile" Standard
The US FAA requires lights visible for 3 statute miles. While Transport Canada's rule is "visible to the pilot," adopting the 3-mile strobe standard is the safest way to fly.
Recommendation: Mount a dedicated strobe (like Lume Cube, Firehouse, or VIFLY) to the top of your drone. Manned aircraft (helicopters/Cessnas) are usually above you and need to see you from above.
4. Training Requirements
There is no separate exam for night flying, but the knowledge requirements for both Basic and Advanced exams include night operations.
Recurrent Training: If you are completing your 24-month recurrent training (Standard 921.04), review the night flying sections.
New 2025 Context: With the new regulations effective Nov 4, 2025, allowing medium drones (25kg-150kg) in VLOS, the importance of robust lighting for these larger aircraft is even higher. If you are flying a heavier rig, your lighting must scale up to match the increased risk.

5. Best Practices for Night Ops
Flying at night is 90% preparation and 10% execution.
A. Daylight Site Survey
Never fly a night mission at a location you haven't seen during the day.
Obstacles like power lines and tree branches are invisible at night until you hit them.
Scout your takeoff/landing zone (TO/ALZ) while the sun is up.
B. Use a Visual Observer (VO)
While not strictly mandatory for standard VLOS night flights, a VO is the single best safety asset you can have.
Role: The VO scans the airspace for other aircraft while you stare at the drone/screen.
Communication: "I have an aircraft at 3 o'clock high" allows you to drop altitude immediately.
C. Preserve Night Vision
It takes the human eye 30-45 minutes to fully adapt to darkness.
Dim Your Screen: Turn your controller brightness down to the lowest usable setting.
Red Light: Use a red headlamp for setting up gear. White light destroys night vision instantly; red light preserves it.
D. Mind the Sensors
Obstacle avoidance sensors (visual cameras) usually do not work at night.
Your drone will likely switch to "ATTI" mode or disable obstacle braking because it cannot "see" the world around it.
Fly higher: Stay well above the treeline (e.g., 200ft) to avoid obstacles you can't see.
6. Common Mistakes to Avoid
The "UFO" Effect: Using a strobe that is too bright or placed improperly, blinding the pilot and making it impossible to judge distance (depth perception fails in the dark).
Orientation Loss: Flying too far away. At 400 feet out, two small LEDs merge into one blurry dot. If you don't know which way you are facing, you are in trouble. Trust your telemetry (map/radar on screen), but verify with your eyes.
Battery Fade: Cold temperatures often accompany night flights. Batteries drain faster in the cold. Plan for 20-30% less flight time than usual.
The "Auto-Land" Trap: If RTH (Return to Home) triggers, the drone might try to land on a spot it can't "see." Ensure your RTH altitude is set higher than the tallest obstacle in the area.
********************************************************************************************

🌙 RPAS Night Operations Checklist (Canada)
Reference: CAR Part IX (901.39)
I. Daylight Preparation (Mandatory)
Do not skip this section. Night safety begins while the sun is still up.
[ ] Site Survey (Daylight): Walk the flight area. Identify power lines, trees, and unlit towers that will disappear at night.
[ ] Set "Hard" Boundaries: Identify lit landmarks (streetlights, buildings) that mark the absolute edge of your safe fly zone.
[ ] Obstacle Height Check: Determine the height of the tallest obstacle. Set Return to Home (RTH) Altitude to Tallest Obstacle + 50 feet.
[ ] Weather Brief: Check for fog/mist (which reflects strobes and blinds sensors) and temperature (batteries drain faster at night).
[ ] Civil Twilight Check: Confirm exact time of sunset and end of civil twilight.
II. Equipment Prep (The "Light" Check)
[ ] Anti-Collision Strobe:
[ ] Charged?
[ ] Mounted on TOP of aircraft (visible to manned aircraft above)?
[ ] Secured firmly (Velcro/Tape check)?
[ ] RPAS Navigation Lights: Green/Red arm LEDs are active and not taped over.
[ ] Pilot Gear:
[ ] Red headlamp/flashlight (to preserve night vision).
[ ] High-visibility vest (safety for ground crew).
[ ] Screen Brightness: Turn controller/tablet brightness down to minimum readable level.
[ ] Sensors: Disable "Obstacle Avoidance" if it relies on visual cameras (prevent ghost braking).
III. On-Site Pre-Flight (Night)
[ ] Crew Briefing:
[ ] Designate Visual Observer (VO) scanning sectors.
[ ] Agree on "Blind" terminology (e.g., "I have lost the aircraft" = Pilot stops immediately and climbs).
[ ] Takeoff Zone: Establish a "Dark Zone" (no car headlights/flashlights pointing at the pilot).
[ ] Airspace Scan: Listen for aircraft engines before powering up.
[ ] Power Up:
[ ] Turn on Controller first.
[ ] Turn on Drone.
[ ] Turn on Strobes immediately.
[ ] Compass Check: Verify map orientation matches reality (crucial since visual landmarks are hidden).
IV. Takeoff & Hover Check
[ ] Hover at 15ft:
[ ] Verify orientation (Green LEDs right, Red LEDs left).
[ ] Verify Strobe visibility.
[ ] Check stability (is the drone drifting?).
[ ] Control Check: Yaw left/right to confirm you can track orientation via lights alone.
V. Emergency Procedures (Night Specific)
Lost Orientation: Stop -> Climb (to clear obstacles) -> Rotate until Green/Red lights identify nose direction -> Reference map screen.
Aircraft Entering Airspace: Drop altitude immediately. Manned aircraft cannot see you easily against ground lights.
Lost Visual Line of Sight: Engage RTH immediately. Do not try to "look for it" manually in the dark.
Tips for Printing
Laminate this page: Keep it in your drone case with a dry-erase marker.
Red Light Friendly: If you print this, use a large, bold font (size 12+) so it is readable under a red headlamp.


Comments